
When Dynamics 365 or Power Platform solutions need to talk to the outside world (aka Internet) – calling an Azure Function, pushing messages to a Service Bus, talking to an external API, a legacy system or retrieving secrets from Key Vault – two security questions immediately arise: who is making the call, and how does the traffic get there.
The traditional answer to the first question is credentials: a connection string here, an API key there, a service principal secret stored somewhere in your solution. The problem is that credentials can be stolen, rotated incorrectly (you need to inform all consumers when changes and monitor expiration to a void any outages), or leaked in logs. The traditional answer to the second question is the public internet: traffic leaves Power Platform, crosses Azure’s backbone, and reaches its destination over endpoints that have to be publicly accessible. The problem is that public endpoints are attack surface and you potentially do not want to expose your internal legacy tool – at least not the API from it.
This article addresses both topics. By combining Managed Identity with Azure Virtual Network for Power Platform, you eliminate credentials entirely and keep all traffic inside your private network. Two pillars, one architecture:
- Nothing to steal – Managed Identity replaces static credentials with short-lived tokens issued dynamically at runtime.
- Nowhere to listen – VNet integration keeps outbound traffic inside your delegated subnet, never crossing the public internet (if setup correctly or allowing it on an exception endpoint base).
This is Zero Trust applied to Dataverse: verify explicitly, use least privilege, assume breach.
How it all fits together
Before zooming into each pillar, here is the full architecture we are building.
The foundation is a Managed Environment with Dataverse plugins that initiate outbound calls. When Virtual Network support is enabled, those plugins no longer run in shared Power Platform infrastructure – they run inside containers that are injected at runtime into a delegated subnet you own and control. From that subnet, all traffic is subject to your network policies. The easiest way to understand how the two pillars interact is through a 2×2 matrix. Two environments, two scenarios, four outcomes – each one intentional:
| Use Key Vault | Use Function | |
| Demo 1 – Identity (no VNet) | ✅ Secret read via Managed Identity | ❌ Private Function unreachable |
| Demo 2 – Network (VNet) | ❌ Key Vault blocked by NSG | ✅ Function reached via private endpoint |
The failures (❌) are not bugs – they are the point. Each environment demonstrates one pillar working, and the other one failing on purpose. That boundary is exactly what you want in production.
Demo 1 runs with normal public egress. The plugin authenticates to Azure Key Vault using a Managed Identity token – no credentials stored anywhere. But call the private Function App and you get a 403: it’s not reachable from the public internet. Identity works. Network doesn’t apply.
Demo 2 is injected into a VNet with an NSG rule that blocks all internet-bound traffic. The plugin reaches the private Function App through a private endpoint – traffic never leaves the network boundary. But try to call the public Key Vault endpoint and the NSG drops the packet. Network works. And the Key Vault failure is deliberate – in a real setup, you’d put Key Vault behind a private endpoint too of course but as the function is an Azure Service we do not need to get a credential to authenticate to it.
The diagram below shows how the two pillars coexist in the same architecture. Blue is identity, green is network – each pillar is independent, but they complement each other.
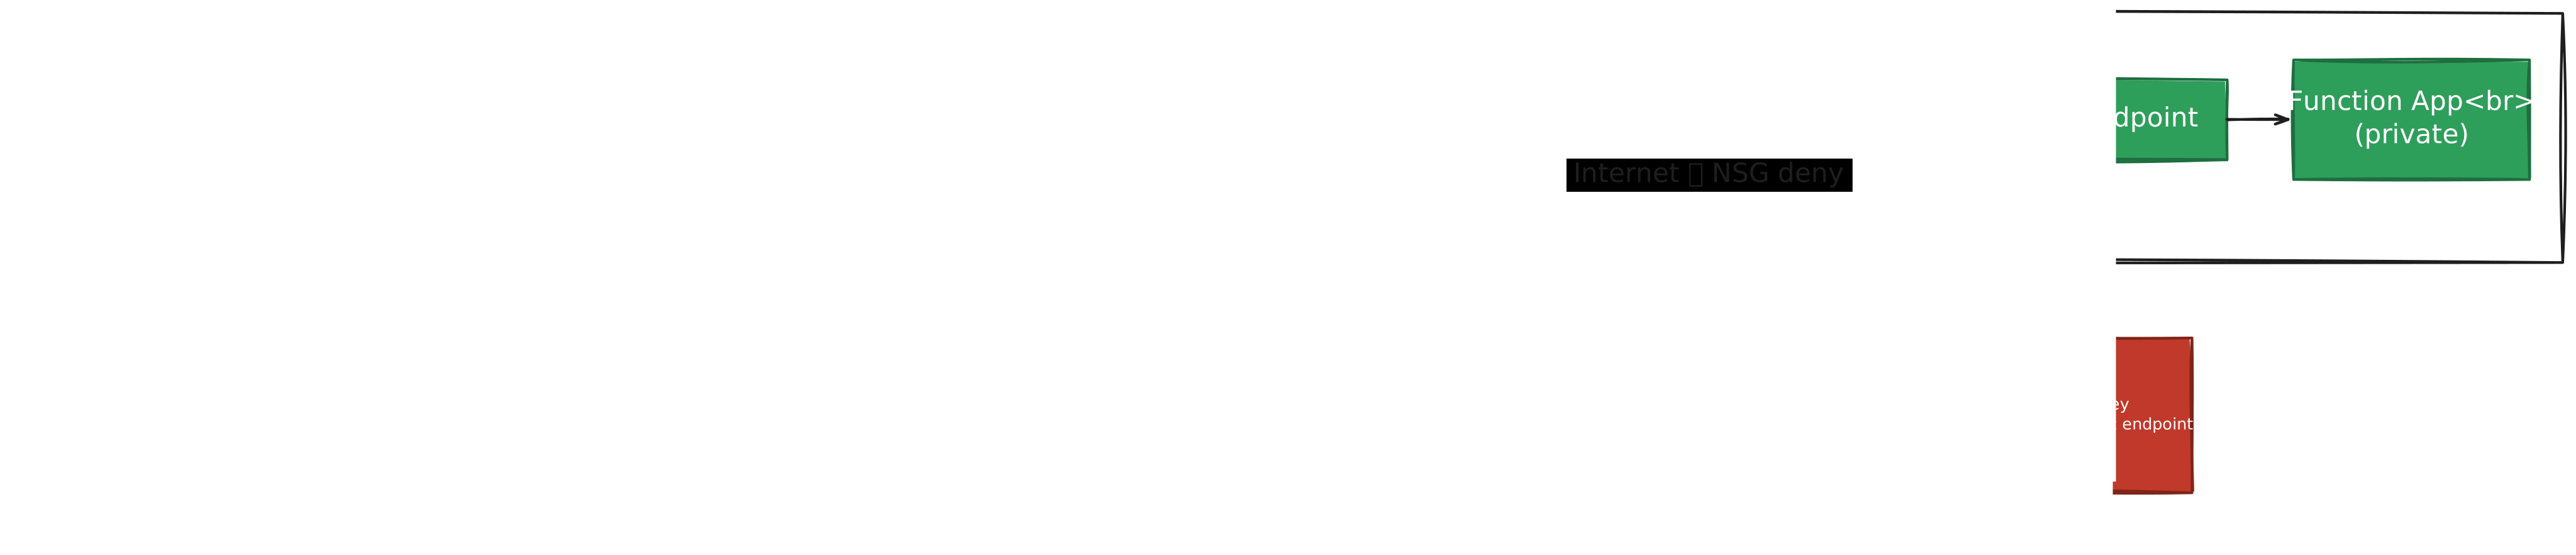
The full PoC and all provisioning scripts are available on GitHub: dataverse-secure-outbound. I deliberately use the Az Cli and not any IaC (Terraform and/or Bicep) to ensure most people can understand it.
Pillar 1 – Managed Identity: Nothing To Steal
Idea is very simple: instead of storing a client secret, a connection string, or an API key in your solution (environment variable or table etc), the plugin asks Microsoft Entra ID for a short-lived token at runtime. No credential ever touches your code or your configuration.
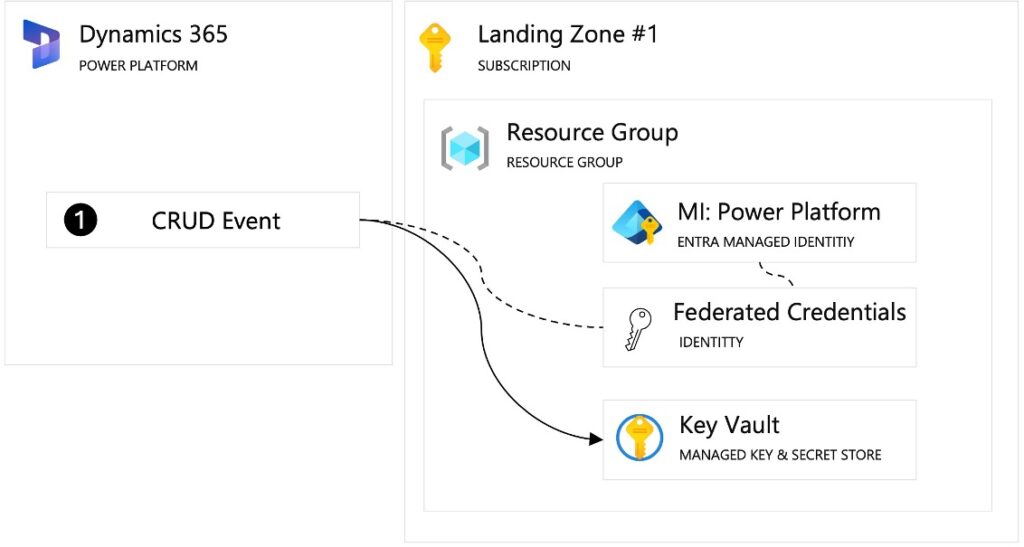
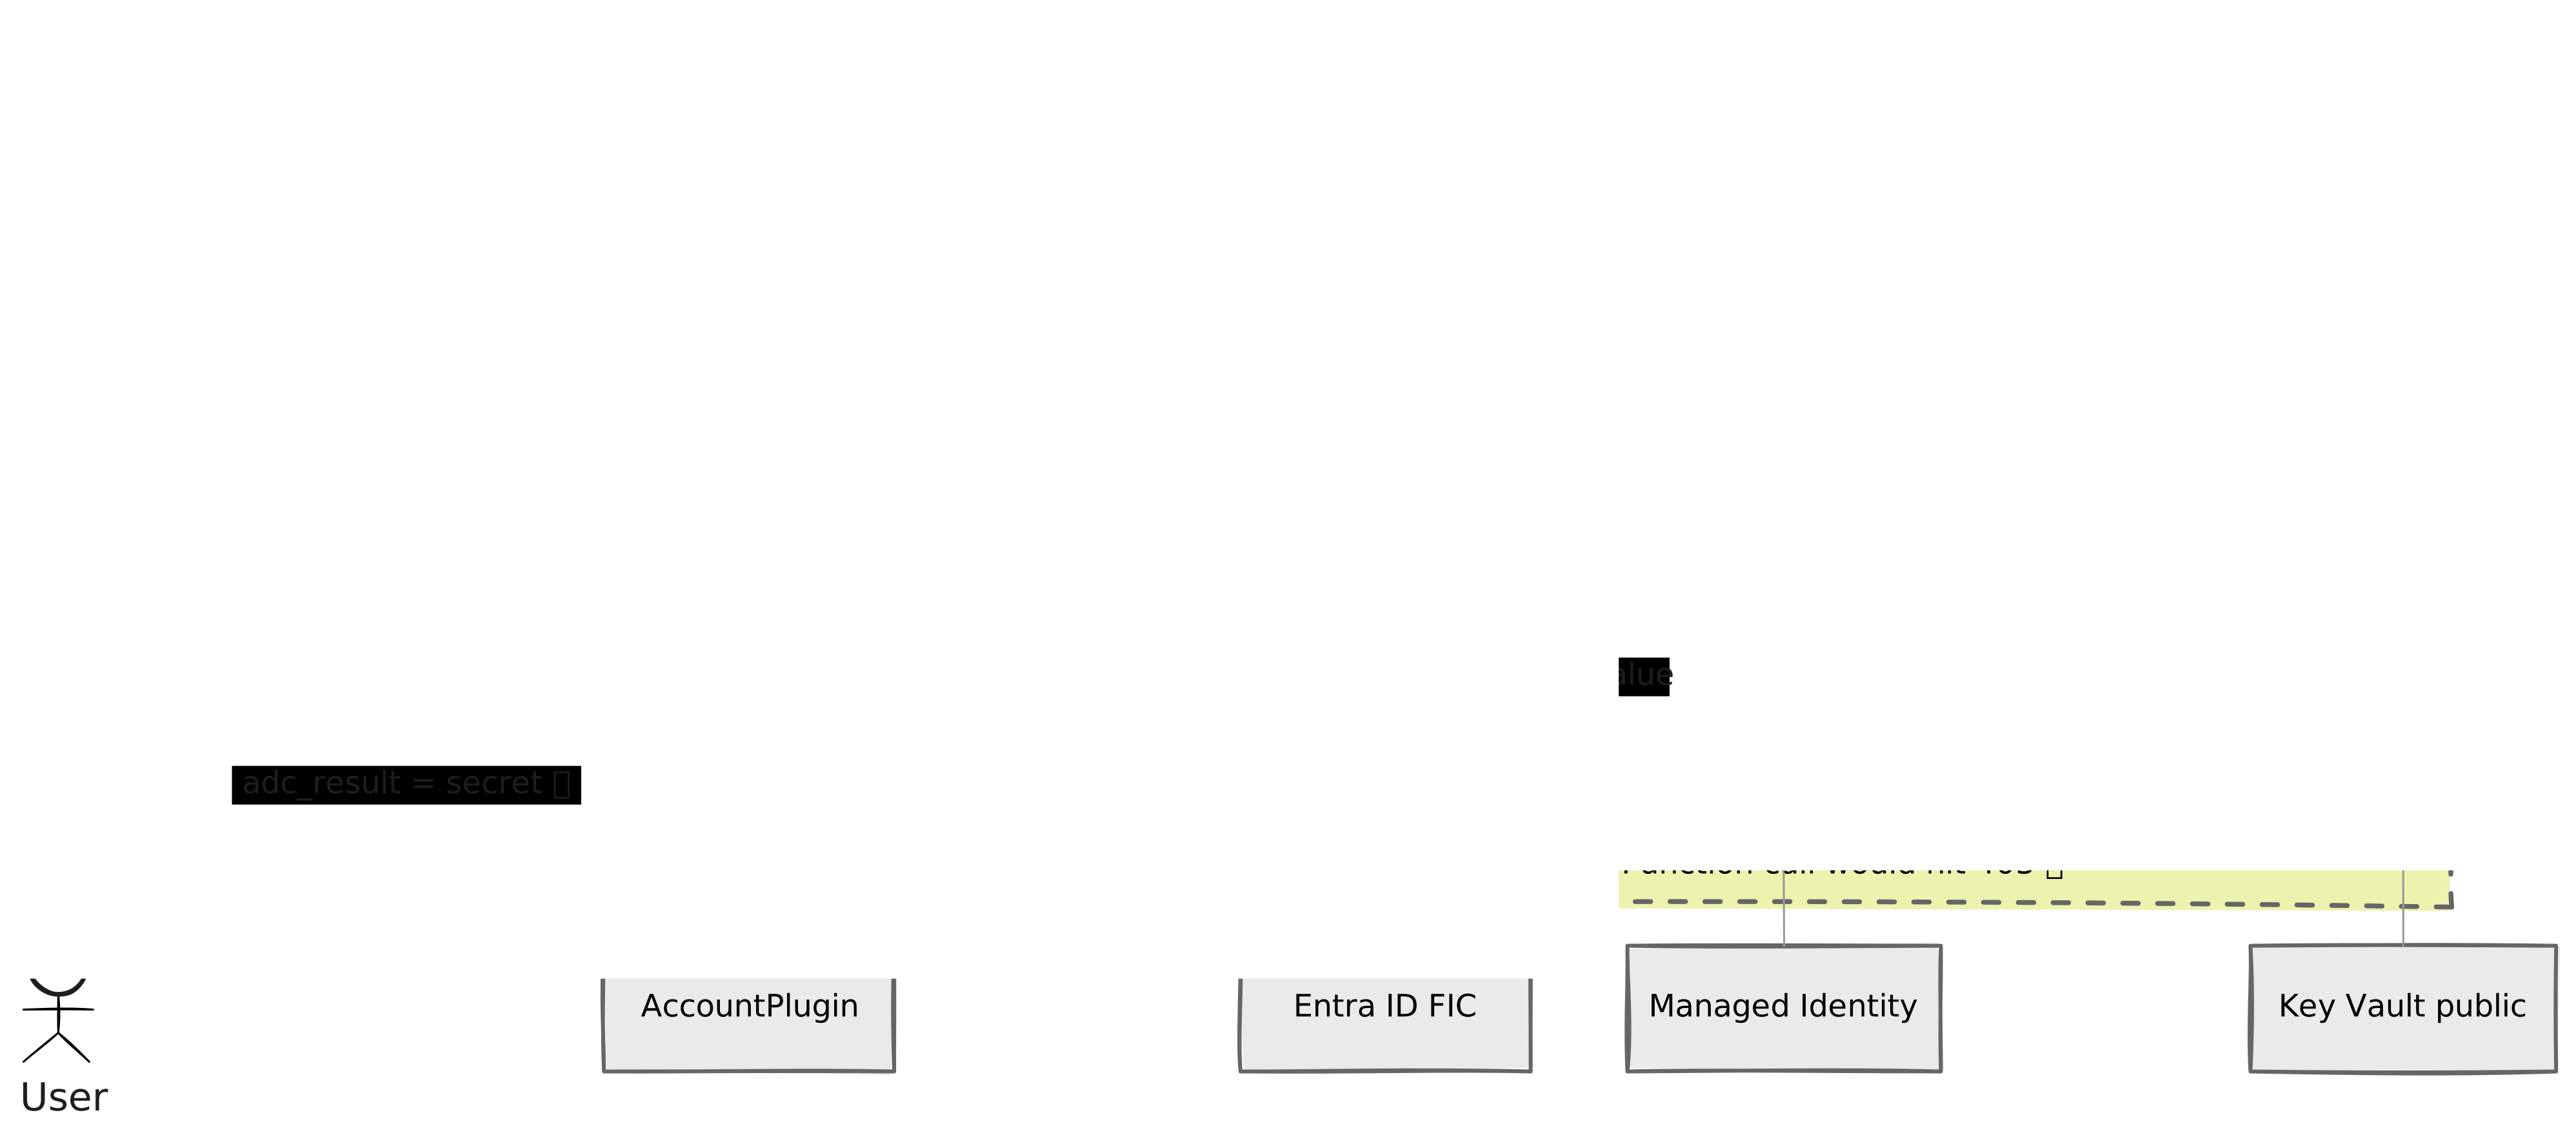
The sequence diagram below illustrates the full token flow for Demo 1. Notice that the plugin never holds a credential – it requests a token from Entra ID through FIC federation, and the Managed Identity handles the rest.
How it works under the hood
Power Platform Managed Identity relies on Federated Identity Credentials (FIC). You create a User-Assigned Managed Identity (or an App Registration) in Entra ID, then configure a FIC that lets Dataverse authenticate as that identity. The FIC subject encodes three things: your tenant, your Dataverse environment, and a hash of the certificate used to sign the plugin assembly. That last part is what ties the identity to the code – you can’t impersonate the identity without the signing certificate.
In the plugin code, token acquisition is a single call:
var tokenService = (IManagedIdentityService)serviceProvider
    .GetService(typeof(IManagedIdentityService));

string token = tokenService
    .AcquireToken(new[] { "https://vault.azure.net/.default" });
As you can see there is no credentials and we’re not even retrieving secrets in environment variables or from somewhere else and so also no rotation overhead.
Version 2 – use it, always
Two versions of the FIC format exist. Version 1 uses the certificate CN as the subject identifier, which breaks on any CN containing non-ASCII characters or commas. Version 2 computes a SHA-256 hash of the full Distinguished Name – fixed-length, ASCII-only, no edge cases. For all new setups, version 2 is the only sensible choice.
Certificate: signing locally and in CI/CD
The plugin assembly must be Authenticode-signed – this is what Managed Identity actually checks. The SHA-256 hash of the signing certificate is embedded in the FIC subject. If the cert doesn’t match, the token request fails. Strong-name signing (.snk) is a separate concern and optional for plugin packages – don’t confuse the two.
Locally, the csproj handles signing automatically via a post-build MSBuild target. When you build Release, it runs Sign-Assembly.ps1 on the DLL and Sign-NuGetPackage.ps1 on the .nupkg – but only if a signing input is found. If nothing is configured, the targets are inert and the build succeeds unsigned. Nobody is blocked.
The certificate is resolved in this exact order:
- Thumbprint – if
<CodeSignThumbprint>is set insigning.local.props, the cert is read directly from your Windows certificate store. No.pfx, no password on disk. Cleanest option. - PFX path – explicit
<CodeSignPfxPath>, or the auto-detect locationcerts/SecureOutboundPluginSigning.pfxif you just drop the file there. - None found → signing is skipped silently.
For the password (when using a PFX), the resolution order is:
- Explicit
<CodeSignPfxPassword>insigning.local.props - Environment variable
SECUREOUTBOUND_PFX_PASSWORD - Windows Credential Manager under the target name
SecureOutboundPlugin.CodeSign
In practice, the three options rank like this:
- 🥇 Thumbprint – no
.pfx, no password on disk, cert lives in your Windows store. Best for a developer machine. - 🥈 PFX + Credential Manager – if you must use a
.pfx, the password never appears in plaintext anywhere. - 🥉 PFX + password in
signing.local.props– simplest for a quick local demo, the file is gitignored so nothing is committed.
In CI/CD, the local targets are disabled under GITHUB_ACTIONS / TF_BUILD – no clash with the pipeline. Instead, the pipeline reads CODE_SIGN_PFX_BASE64, a per-GitHub-Environment secret: it decodes it to a temp .pfx, signs the DLL and the .nupkg, then immediately deletes the file. In CI, if the secret is absent the signing step is skipped with a warning – forks and PRs without the secret stay green. In CD, signing is required and the pipeline fails fast if the secret is missing.
One certificate per trust tier: dev/test environments use a self-signed cert stored in the DEV GitHub Environment secret, production uses a CA-issued cert stored in PROD. Each environment’s FIC carries the hash of the cert actually used there – so different tiers legitimately have different FICs. “Build once” holds within a tier; at the prod boundary you re-sign with the prod cert, and prod’s FIC must match it.
Setup in five steps
- Create a User-Assigned Managed Identity (or App Registration) in Entra ID. Note the client ID and tenant ID.
- Sign the plugin assembly with your certificate via
signtool(DLL) andnuget sign(package). - Configure the FIC on the managed identity – issuer:
https://login.microsoftonline.com/{tenantId}/v2.0, subject in the v2 format:/eid1/c/pub/t/{encodedTenantId}/a/.../n/plugin/e/{environmentId}/h/{certHash}. - Create the
managedidentityrecord in Dataverse via Web API (version: 2), then link it to the plugin package. - Assign RBAC on the target Azure resource — e.g.
Key Vault Secrets Userscoped to the specific vault.
The PoC automates steps 1, 3, and 5 with a single script:
./scripts/Setup-AzureResources.ps1 `
  -TenantId "tenantId" -SubscriptionId "sub" `
  -EnvironmentId "dataverse-env-guid" `
  -CertificatePath "codesign.pfx" -CertificatePassword "pwd" `
  -ResourceGroupName "rg-secure-outbound" `
  -KeyVaultName "kv-secure-outbound" `
  -ManagedIdentityName "mi-secure-outbound"
One gotcha: ALM
The managedidentity record is/can be part of the solution. It holds per-environment data (the client ID of the MI for that environment), but embedding it in the solution would overwrite every environment’s applicationid on import. So you do have two choices to manage it “properly”:
- Provision the record separately per environment – ideally in your CD pipeline, before the solution import. In my GitHub repo, it’s exactly what the CD pipeline does: upsert the record pre-import, then re-associate the package post-import to make sure the link survives a fresh install.
- Add it in your solution and update the xml before pack operation by injecting the target applicationId representing the MI used by the target environment. What will be very useful is if one day Microsoft enable this as part of a Deployment Setting Configuration.
In both cases, you will have to store your applicationid in your Repo for the target env (either using environment variables inside Github or the same in Azure DevOps or eventually in a custom file implementation stored in your repo. If you’re using the option 2, the Dataverse primary key will be the same so in the first option I’m ensuring this too by creating the record with the same id so all environments have the same Dataverse Record Id, it’s easier to debug it. We could have try to mix both option too, but anyway you have the idea here.
The PoC handles this with a single script called twice in the CD pipeline:
# Before solution import — upsert the managedidentity record at a fixed GUID
./scripts/managed-identity/Provision-ManagedIdentityDataverseRecord.ps1 `
  -DataverseUrl "https://org.crm4.dynamics.com" `
  -DataverseRecordManagedIdentityId "fixed-mi-guid" `
  -ApplicationId "mi-client-id" `
  -TenantId "tenantId" `
  -AccessToken $token

# After solution import - re-associate the plugin package AND assembly to the record
./scripts/managed-identity/Provision-ManagedIdentityDataverseRecord.ps1 `
  -DataverseUrl "https://org.crm4.dynamics.com" `
  -DataverseRecordManagedIdentityId "fixed-mi-guid" `
  -ApplicationId "mi-client-id" `
  -TenantId "tenantId" `
  -AccessToken $token `
  -AssociatePackage
A few deliberate choices worth noting. The script is fully idempotent – every run reconciles applicationid, tenantid, credentialsource, subjectscope, and version via a PATCH, so config drift across environments is impossible. The -AssociatePackageflag binds both the pluginpackage and the pluginassembly to the record -without it, a fresh solution import silently drops the link and the plugin fails at runtime with “PluginPackage … is not associated to a Managed identity”. And the fixed GUID means the PATCH body is byte-for-byte identical in every environment – set it once, reuse it forever.
Seeing it in action: the Key Vault read end-to-end
The video below walks through the full Demo 1 setup: the Azure resources (Managed Identity, Key Vault, FIC), the solution in make.powerapps.com, the managedidentity record in Dataverse and its link to the plugin package, and finally the plugin reading the Key Vault secret live on an Account save.
Behind the scenes: signing the assembly and the CI/CD pipeline
What the first video doesn’t show is what happens before the plugin ever runs – signing the assembly locally and in the CD pipeline, and how the pipeline provisions the managedidentity record and re-associates the package after each import. This second video is split in two parts: local signing setup (thumbprint / PFX options), then the CI build and the full CD run end-to-end.
Pillar 2 – Virtual Network: nowhere to listen
We just covered how Managed Identity removes the credential problem entirely – nothing to steal because there is nothing stored. VNet tackles the second question: even if someone could intercept the traffic, there is nowhere to listen. Once your environment is subnet-delegated, outbound calls never leave your private network.
How it works under the hood
When VNet support is enabled on a Managed Environment, Power Platform injects the plugin execution container at runtime into your delegated subnet. The container gets an IP address from that subnet’s address space. Any outbound call from the plugin travels as internal network traffic – your NSG rules, route tables, and firewall policies all apply, exactly as they would for any other workload in your VNet.
You don’t manage the container. You manage the network.
What we are really demonstrating here is a private path to a private resource. The Function App has its public network access disabled – try to reach it directly over the internet and you get a 403, it simply isn’t exposed. But from inside the VNet, the plugin reaches it through a private endpoint: the DNS resolves the Function hostname to a private IP, and the traffic flows entirely within the private network. It never touches the public internet.
The Key Vault is the mirror image. It is exposed on a public endpoint – but our NSG blocks all internet-bound traffic from the injected subnet. So the plugin, running inside the VNet, cannot reach it. The packet is dropped at the NSG boundary.
That contrast is the whole point: the resource we want to reach (private Function) is reachable only through the private network, and the resource sitting on the public internet (Key Vault) is unreachable because our traffic never leaves that private network. Outbound flow stays inside your boundary, full stop.
The private endpoint and DNS resolution are what make this work – and they are worth understanding, because this is where most setups break.
When you create a private endpoint for the Function App, Azure assigns it a private IP inside your VNet. But the plugin doesn’t call an IP – it calls a hostname (fn-secure-outbound-demo.azurewebsites.net). By default, that hostname resolves to the Function’s public IP. To route through the private endpoint, you need the privatelink.azurewebsites.net private DNS zone, linked to your VNet, holding an A record that maps the hostname to the private IP.
So the flow is: the plugin resolves the Function hostname → the private DNS zone returns the private IP → the traffic goes to the private endpoint → the private endpoint forwards it to the Function, all inside the VNet. If the private DNS zone is missing or not linked, DNS returns the public IP, the traffic tries to egress to the internet, and the NSG drops it – the exact same failure as the Key Vault, but for a completely different reason.
That last point is the subtle trap: a private endpoint without its DNS zone looks identical to a network block. Always verify DNS resolution first.
The NSG: your actual security boundary
The NSG on the injection subnet is what defines the boundary in Demo 2. A single outbound deny rule (priority 200) blocks all internet-bound traffic before the default AllowInternetOutBound rule (priority 65001) can match. AllowVnetOutBound (priority 65000) stays intact – so the private Function App, reachable via a private endpoint inside the VNet, gets through fine. The public Key Vault doesn’t.

One important detail: NSG deny rules drop packets, they don’t reject them. The Key Vault SDK gets no response and waits – without mitigation, that’s a 2-minute Dataverse plugin timeout. In the PoC, the Key Vault client is configured with a 10-second network timeout and zero retries, so the failure surfaces fast with a clear message instead of hanging.
Two VNets, not one
For most geographies – including Europe and the US – Power Platform spans two Azure regions for high availability. Your environment can run in either region and can fail over between them. You need two delegated subnets in two paired Azure regions, linked together in a single Enterprise Policy. For a European environment, that means westeurope + northeurope.
⚠️ Watch out for constrained regions. Some Azure regions are restricted and don’t allow you to freely provision resources without a Microsoft quota exception – francesouth is a well-known example (it’s a restricted paired region that requires a Microsoft-granted exception to deploy into directly). If your Power Platform environment maps to a region pair that includes one of these, check availability before you start – otherwise the second VNet creation will fail and block the whole Enterprise Policy. When possible, favor an environment whose region pair maps to fully open Azure regions like West Europe / North Europe.
Subnet sizing – get this wrong and you’ll know it in production.
Too small a subnet means silent plugin failures under load – containers can’t get an IP, requests just hang. Microsoft telemetry suggests:
- Production: 25-30 IPs → allocate a
/26(62 usable IPs, with headroom) - Non-production: 6-10 IPs → a
/28(11 usable IPs) is sufficient
If multiple environments share the same Enterprise Policy, multiply accordingly. Five IPs per subnet are reserved by Azure before you start.
One critical limitation before you enable VNet
Azure-aware plugins are not supported with VNet. Audit your plugin inventory before enabling subnet injection. Discover this after the fact and you are looking at a rollback – and a 30-60 minute wait for sandbox hosts to recycle back.
Setup: Enterprise Policy + subnet delegation
Prerequisites
- An Azure subscription linked to your Power Platform tenant
- Network Contributor role (or equivalent) on the target resource group
- Power Platform Administrator role in Entra ID
- The
Microsoft.PowerPlatform.EnterprisePoliciesPowerShell module
Install-Module Microsoft.PowerPlatform.EnterprisePolicies
Import-Module Microsoft.PowerPlatform.EnterprisePolicies
Step 1 – Create the VNet, subnets, private Function App, private endpoint and DNS zone
./scripts/vnet/Setup-FunctionPrivateEndpoint.ps1 `
  -SubscriptionId "sub" `
  -ResourceGroupName "rg-secure-outbound-demo" `
  -Location "westeurope" `
  -FunctionAppName "fn-secure-outbound-demo" `
  -DisablePublicNetworkAccess $true
This creates two subnets in the VNet: one for the private endpoint, one for Power Platform injection (delegated to Microsoft.PowerPlatform/enterprisePolicies). It also creates the privatelink.azurewebsites.net private DNS zone and links it to the VNet – critical for name resolution inside the subnet.
Step 2 – Create the Enterprise Policy and delegate subnets in both paired regions
For Europe, you need two VNets: westeurope + northeurope. The PoC handles both in a single script:
./scripts/vnet/Setup-PowerPlatformEnterprisePolicy.ps1 `
  -SubscriptionId "sub" `
  -ResourceGroupName "rg-secure-outbound-demo" `
  -EnvironmentId "demo2-env-guid" `
  -TenantId "tenantId"
Under the hood this runs New-VnetForSubnetDelegation for each region and New-SubnetInjectionEnterprisePolicy to create the Enterprise Policy spanning both VNets, then Enable-SubnetInjection to link it to the environment.
Step 3 — Validate
# Check which region your environment is in
Get-EnvironmentRegion -EnvironmentId "env-guid"

# Test DNS resolution from the delegated subnet
Test-DnsResolution -EnvironmentId "env-guid" -HostName "fn-secure-outbound-demo.azurewebsites.net"

# Test TCP connectivity
Test-NetworkConnectivity -EnvironmentId "env-guid" -Destination "fn-secure-outbound-demo.azurewebsites.net" -Port 443
If DNS returns a public IP instead of a private one, the private DNS zone is not linked to the VNet – that’s the most common misconfiguration.
⚠️ Subnet injection propagation takes 30-60 minutes after linking. You’ll briefly see “no Sandbox Hosts available” – that’s the recycle in progress. Link the environment ahead of time, not on demand.
Alternatively, link via the Power Platform Admin Center: environment → Settings → Network / Virtual network → link the Enterprise Policy. No scripting required, same result.
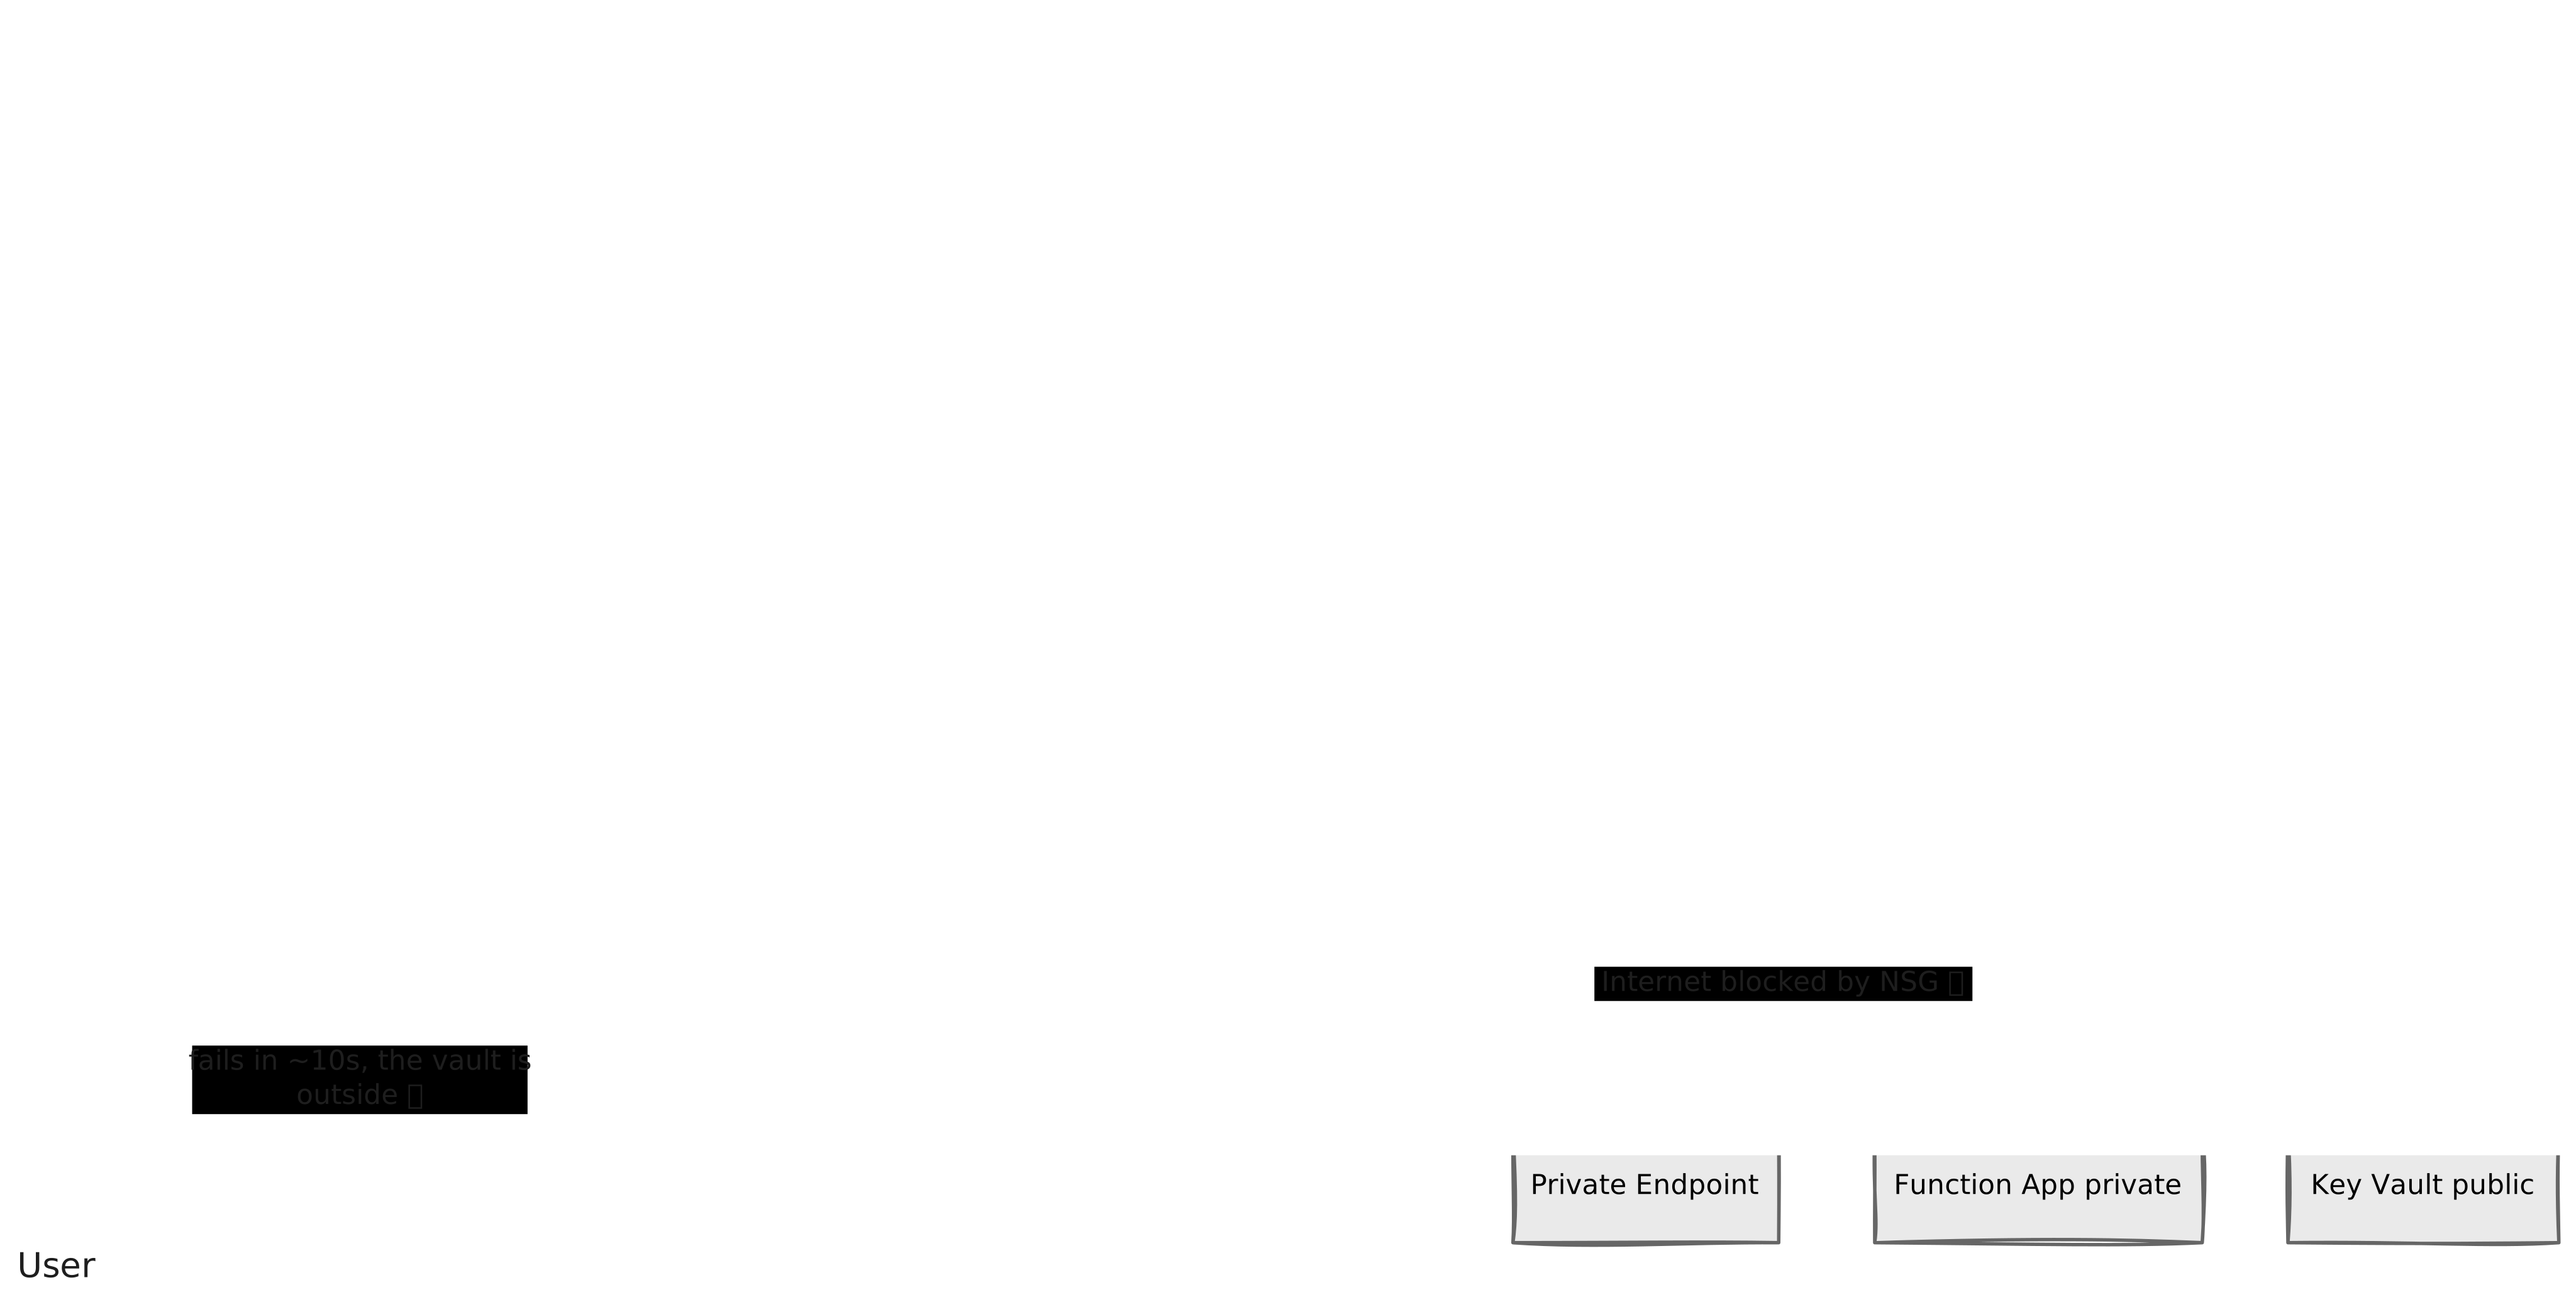
The sequence diagram for Demo 2
The sequence below shows both flows in Demo 2 – the successful Function call and the intentional Key Vault failure:
Seeing it in action: the VNet boundary end-to-end
The video below walks through the Azure resources and the live demo:
- A tour of the Azure setup: the VNet with its two subnets (injection + private endpoint), the NSG and its outbound rules (the deny-internet rule that defines the boundary), the Function App with public network access disabled, the private endpoint attached to it, and the
privatelink.azurewebsites.netDNS zone linked to the VNet - The Enterprise Policy linked to the Dataverse environment, shown active in the Power Platform Admin Center
- The plugin in action: tick Use Function – the call routes through the injected subnet, resolves to the private IP, reaches the Function through the private endpoint, and returns the ERP number ✅
- Then tick Use Key Vault – the NSG drops the internet-bound packet, the SDK times out in ~10 seconds, and the plugin surfaces a clear error ❌
Wrapping up
Managed Identity answers who: the plugin never holds a credential – it requests a short-lived token at runtime, tied cryptographically to the signing certificate and the Dataverse environment. Nothing to steal because there is nothing stored.
Virtual Network answers where: once the environment is subnet-delegated, outbound traffic never crosses the public internet. The NSG defines the boundary, the private endpoint enforces it, and your network policies apply exactly as they would for any other workload in your VNet. Nowhere to listen because there is no public surface.
In production, you layer both. Identity without network means your tokens travel over public infrastructure. Network without identity means your private endpoints are protected but your credentials are still somewhere, waiting to be leaked or rotated incorrectly.
The PoC at dataverse-secure-outbound is designed to be reproduced solo – two environments, a handful of scripts, no IaC required. Clone it, run the provisioning scripts, and you will have a working demonstration of both pillars in under an hour.
If you have questions or feedback, feel free to reach out – and if this was useful, the GitHub repo appreciates a ⭐.



Leave a Reply