Often when we set up a Business Application based on a Dataverse database, we are asked to make data available for reporting purposes or simply to feed a third-party database that will be consumed later.
We could imagine at first to build an interface to send the data and no matter the target system, but this requires a certain architecture and integration complexity: we would have to replicate all actions such as creation, update and deletion while making sure to manage errors 🙂
If you followed the latest announcements at the MS Build held on 25-27 May 2021, you may have noticed the new feature: “Azure Synapse Link for Dataverse” (formerly known as Export to data lake.). In this post we will look at how to use this new released feature to dump data into an Azure Data Lake Gen2 and exploit it from Azure Synapse.
Why?
The first question is finally to ask why we will have to replicate the data to a third-party database.
- Business Intelligence & Analytics:
There are now many solutions that can provide some degree of analysis such as Customer Insight, Sales Insight or even AI Builder which uses the Dataverse database directly to provide these services.
When we want to do data analysis, we can use standard features like views, dashboards, reports, charts etc. but often this may not be enough either because of their limitations or because we want to cross-reference different data sources.
Analysing the data or doing live reporting is not really a clever idea because as you know, Dataverse is a transactional database!
- Own Database:
Even though the format of the data and the Dataverse Web Service is quite simple to use, some companies want to be able to export this data outside the Dataverse database. This can be the case when they want to run Machine Learning, implement advanced analytics capabilities, perform some integration using data flows or simply feed a common database and have some freedom on this data.
Another aspect to consider is the scalability of the solution and the cost involved as Dataverse can quickly become a data generator (especially for customer interactions).
What?
We already know about the ability to export Dynamics 365 (online) data to an Azure SQL Database, stored in a customer-owned Azure subscription, using the Data Export Service available on Microsoft AppSource but as of October 31, 2019, a new feature has been announced, that you may have already seen this or observed that an application user with the name Athena exist in your environment: Exporting CDS data to Azure Data Lake is Generally Available.
And more recently, we now can set up a seamless integration between Dataverse and Azure Synapse Analytics (Preview).
The solution is amazingly simple to implement and allows replicating information not only at initialization but also in an incremental way while replicating CUD operations, which is perfectly suited to the various scenarios. The principle is quite similar with the use of the Azure Data Lake Gen2 because this is precisely what is used for streaming data with Synapse!
- Azure Data Lake Gen 2 is well-known as a solution to store a large amount of data which can be structured or unstructured and is based on Azure Blob storage technology that’s why it’s scalable and cost-effective. Another positive point is that Data Lake is a reference in the world of big data (it interfaces easily with Apache Hadoop environments) and is increasingly used within companies, we can find connectors developed by many editors of data analysis solutions (MicroStrategy, Oracle) as well as Microsoft of course :)!
- Azure Synapse, unlike a Datalake, does not actually store data, it is a set of services and technologies that allow to analyze/understand data based on data warehouses and big data systems (Spark in particular), to build pipelines for data integration in an ETL mode and integrates perfectly with other Microsoft services such as Power BI (and now Dataverse 😉 ).

How?
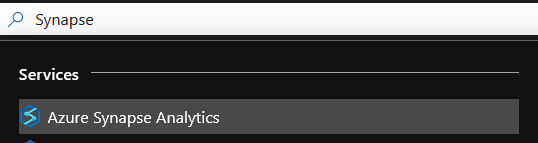
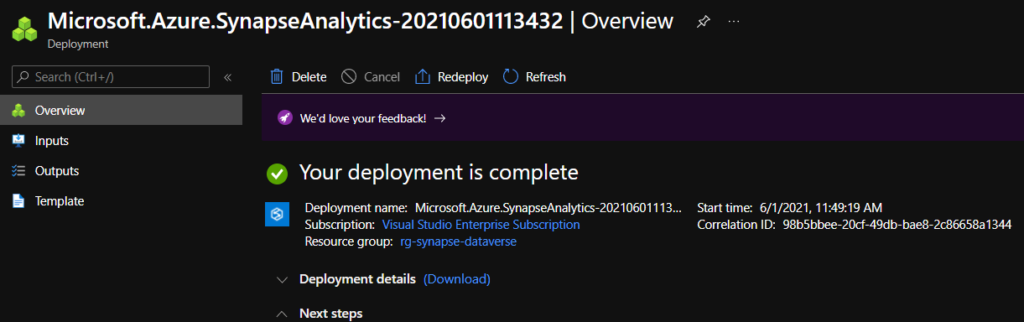
The first thing you need to do is to create a Synapse workspace by creating a new Azure Synapse Analytics service! Be careful about the region you choose as this can cause problems depending on the location of your instance.
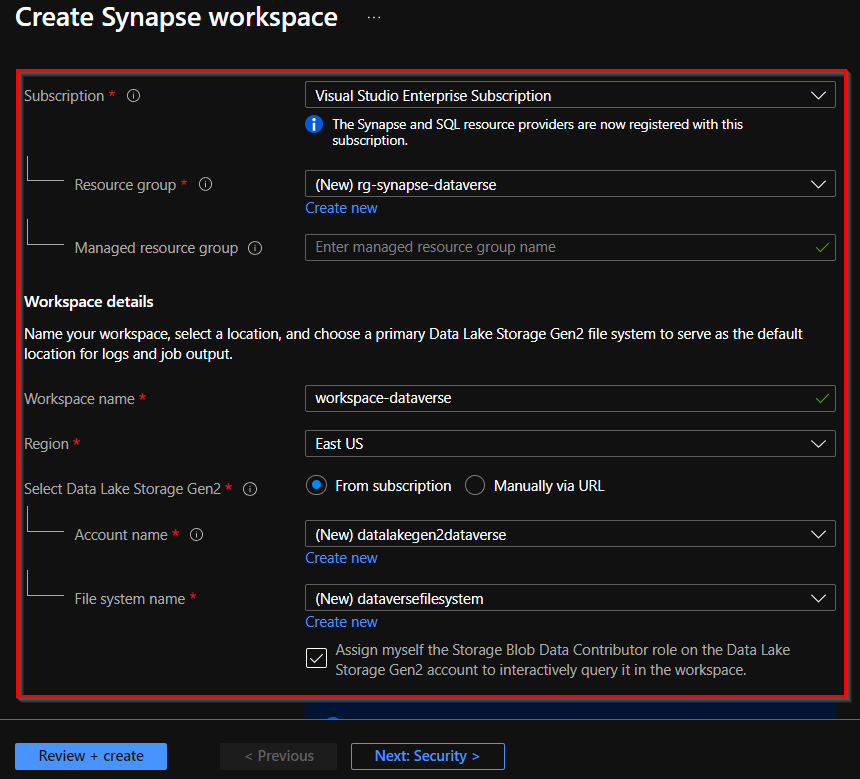
Note: We will create the Azure Gen2 Data Lake at the same time but if you want to use an existing one, you can do so because you can create the DataLake alone and select it when creating Azure Synapse.
When creating the workspace, make sure you select the same region as your Dataverse instance and the previously created/existing Data Lake Gen2:
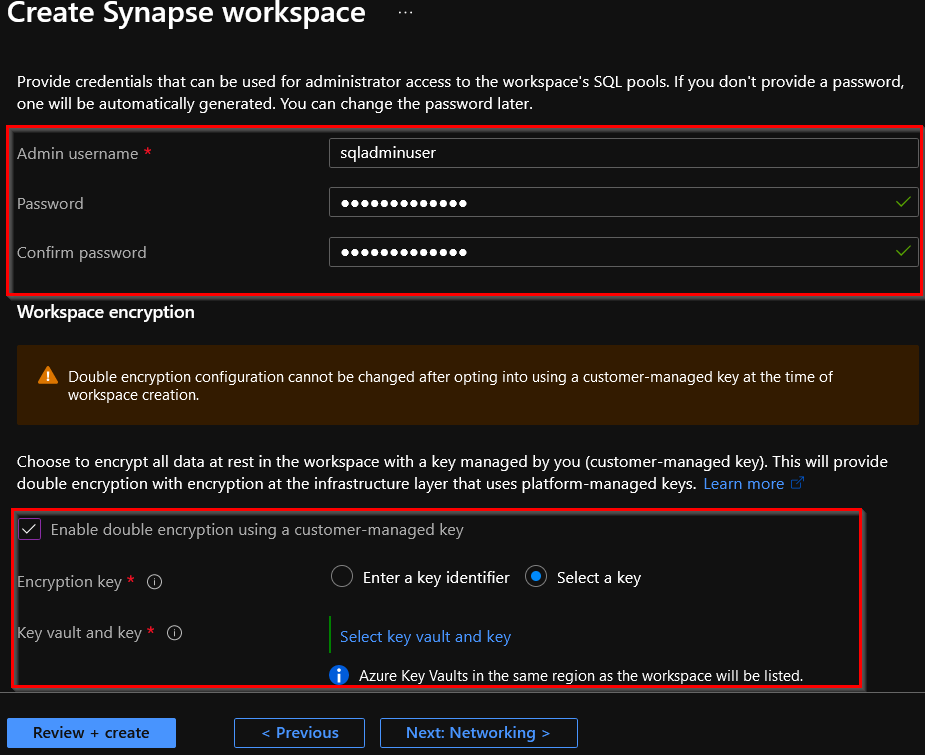
You can now enter the password that will be used to access to the workspace SQL Pools. Note that you can also set up an encryption at the workspace level (and directly use a key stored in Azure Key Vault 🙂 ):
Once everything is done, we can go to the maker portal.
Now we can start configuring our link to the data lake:
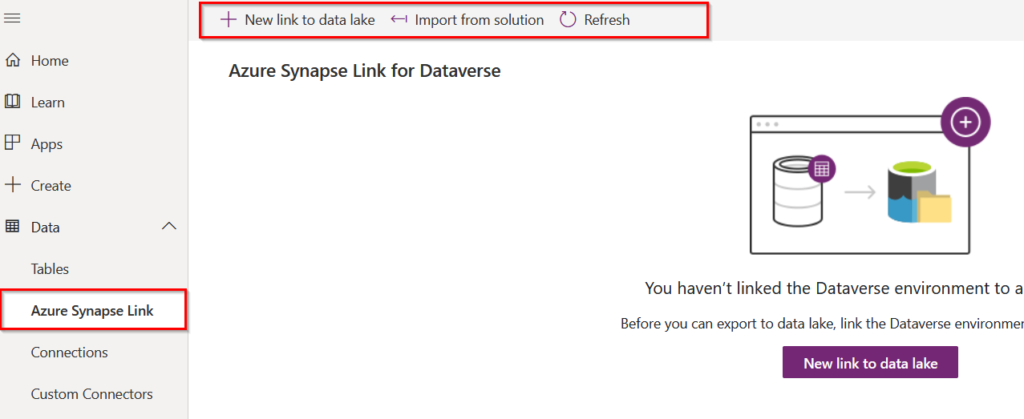
You have certainly seen that the button is still named “New Link to Data Lake”, I do not really know if it will be renamed because in the end, we create a link to a Data Lake but with this “Synapse layer” :).
Once you click on “New link to data lake” you will be asked to enter the Azure Synapse workspace information (you must check the appropriate box, otherwise it will only be a link to a data lake 🙂 ) :
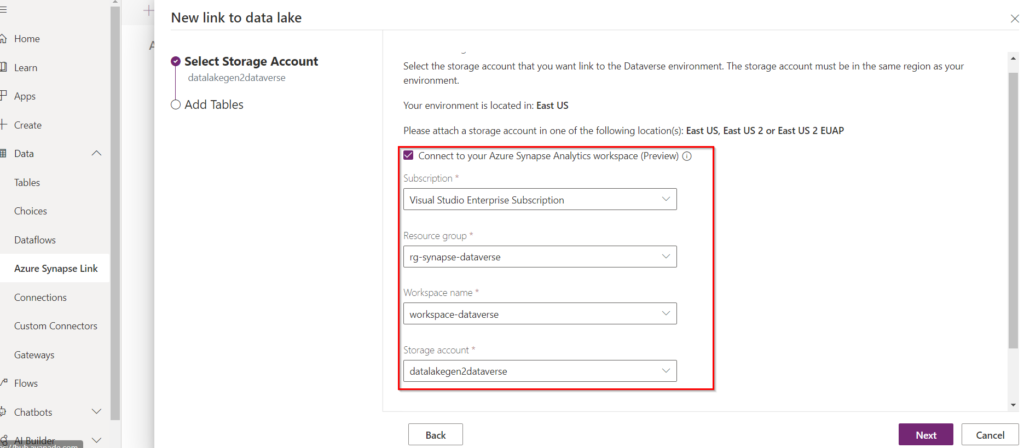
As I said above, you must be careful with the Data Lake Region because it can cause you problems (I had to recreate mine :p ). This is also mentioned by Microsoft, which is an interesting point in case you have customer constraints for the localization of the data!The storage account must be created in the same region as the Power Apps environment you'll use the feature in.
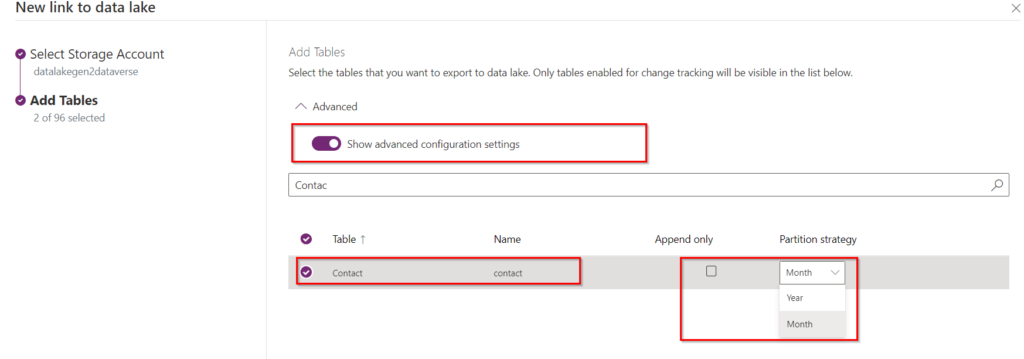
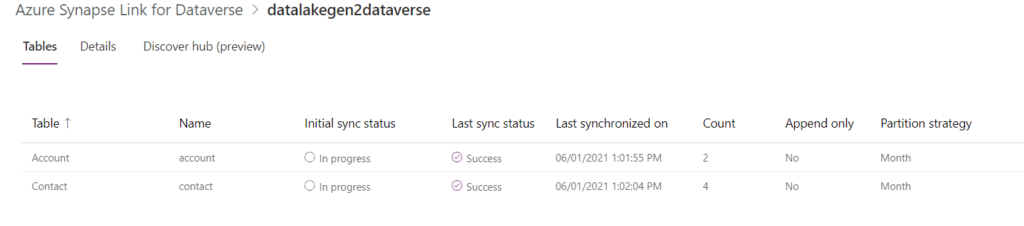
Now we just need to select the tables we want to export, in our case we will only take account and contact entities. Note that we have the possibility to use advanced parameters that consist of choosing how the data will be written to the Data Lake. For this we have two options:
- Append Only: This option will append the CUD operation performed to the corresponding partition in the lake. This means that we will have a history of the actions, as in the case of a delete, we will still have a row to indicate that this specific record has been deleted. In this case, the partition strategy is set to Year.
- In Place Update: In this case, an upsert operation (update or create) is performed on the incremental data in the destination. Thus, if the row exists, it will be updated in the corresponding file, otherwise it will be created. This is the default setting to use.
To understand this, you can select the Append Only option for the contact entity and for more information here is the official link: In-place updates vs. append-only writes.
This allows you to view the initial synchronisation and its progress:
You will notice that you can navigate directly to the Data Lake or the Azure Synapse workspace from the command bar:

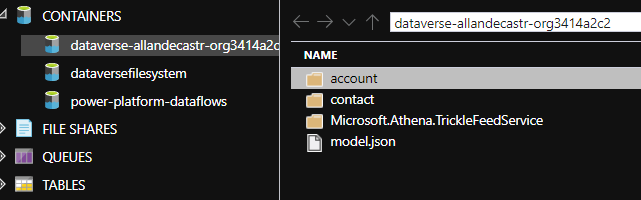
If we decide to open the Azure data lake, we can see the following content with folders for each table we are synchronizing with the chosen granularity (month or year), the associated snapshots are present inside and of course the metadata for each table.
As you can see, the file is generated by month according to the “PartitionStrategy” defined and it’s based on the “createdon” field:

If we open the CSV file we can see our two records without the headers, only the data!

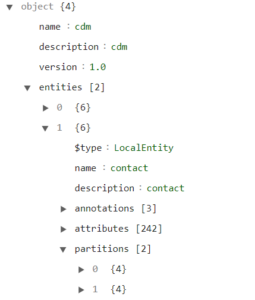
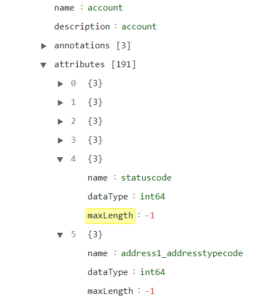
Tables and metadata are well defined in the “model.json” file and we also notice that there are the dates of the initial synchronization and the different partitions:
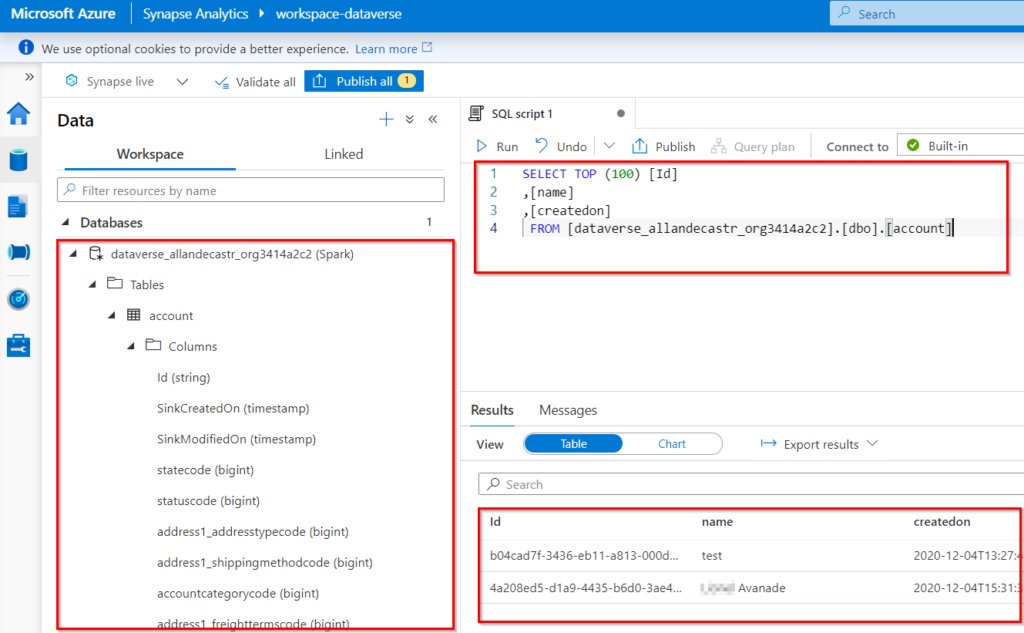
Now let’s try the connection to the Azure Synapse Analytics workspace! By clicking on the button, we go directly to the workspace, and we can see our Dataverse tables, which can then be queried very simply using SQL:
Well, now that we’ve got everything set up, I wanted to try by creating a custom Table and generate a bit more data. For the continuous sync it’s quick, I created over 90k records (using the Xrm ToolBox Mockaroo DataMunger from Carl Cookson) and there is a slight difference between the creation date within Dataverse (on the left) and the creation date from the sync (on the right):

To add a table, it is quite simple we need to add it like the previous ones via the “Manage tables” button and after a few moments you can see that the synchronisation is already done.
Note: You must ensure that the “Enable Change Tracking” is enabled on the table.

As mentioned above, I enabled the “Append only” option for the contact table and performed a few updates and then a delete on the same record and you can see that all operations are performed in sequence:

You can see that the whole record is added and not just the update (here I only updated the firstname and you can see that the lastname is present on each row). So, we have a history of all the actions that are performed. According to the documentation, there would be an isDeleted column = True for delete operations but I haven’t managed to get my hands on it yet.
There is still one crucial point to be addressed, which is how do I deliver all this configuration in different environments? 🙂
For that, we will first install the “Export to data lake” solution from App Source which will allow us later to deploy our “export” configuration, which is a good point for deployment strategies! We can go directly to the portal to get the solution:
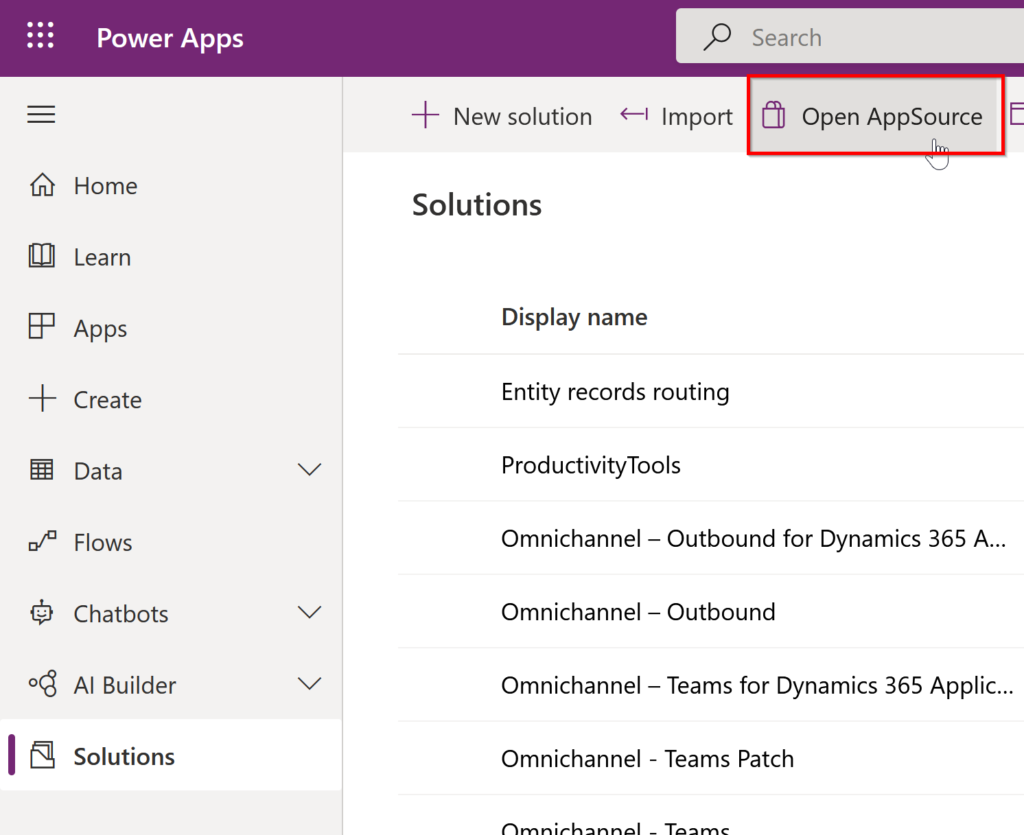
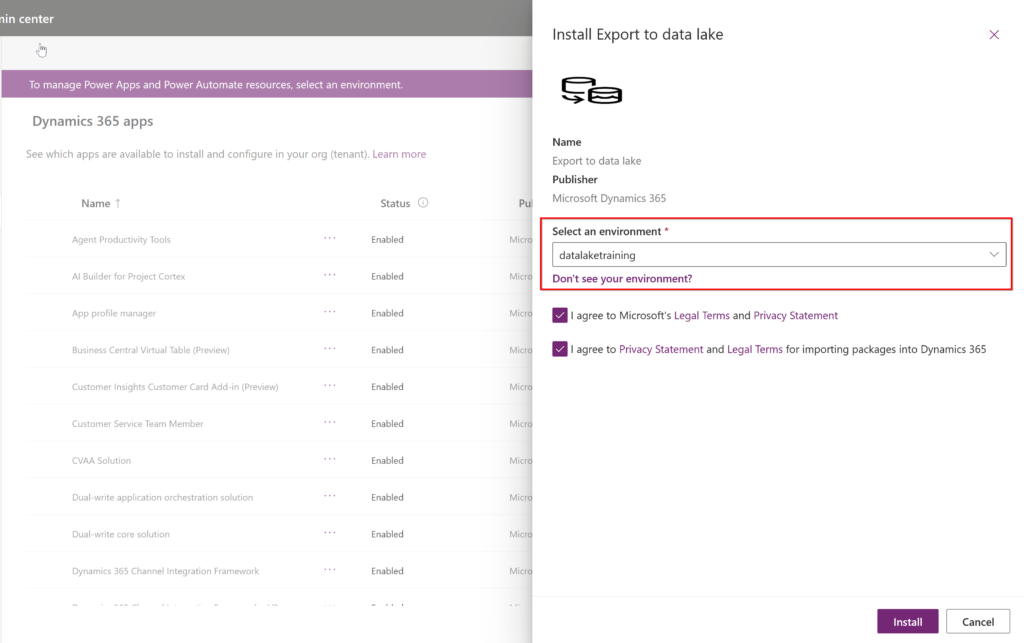
Once on the App Source portal, simply search for the appropriate solution and fill in the form to start the installation. You will be redirected to the administration portal page and simply select the correct environment and click “Install”:
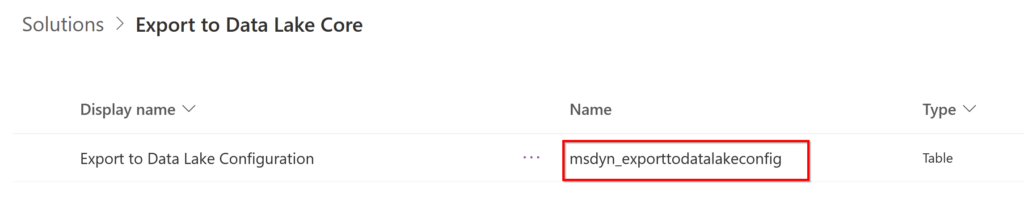
If you are wondering what is in this solution, it seems that there is only one component, a simple table that has no form, so it is not accessible via the User Interface:
We can then create a new solution and add our link to Azure Synapse:

After performed a fast export of the solution, we can see that we have an entity “msdyn_exporttodatalakeconfig” and that the field “msdyn_schema” contains all the configuration in JSON format. We notice that this will not be enough to deploy because many values must be updated if we want to point to another Data Lake in another environnement :/.
      1
      datalakegen2dataverse
      {"SubscriptionId":"xxxxxxxx-xxxx-xxxx-xxxx-xxxxxxxxxxxx","ResourceGroupName":"rg-synapse-dataverse","StorageAccountName":"XXXXX","BlobEndpoint":"https://XXXXX.blob.core.windows.net/","QueueEndpoint":"https://XXXXX.queue.core.windows.net/","TableEndpoint":"https://XXXXX.table.core.windows.net/","FileEndpoint":"https://XXXXX.file.core.windows.net/","FileSystemEndpoint":"https://XXXXX.dfs.core.windows.net/","Entities":[{"Type":"account","PartitionStrategy":"Year","RecordCountPerBlock":125,"AppendOnlyMode":false},{"Type":"adc_customentity","PartitionStrategy":"Year","RecordCountPerBlock":125,"AppendOnlyMode":false},{"Type":"contact","PartitionStrategy":"Year","RecordCountPerBlock":125,"AppendOnlyMode":true}],"RetryPolicy":{"MaxRetryCount":12,"IntervalInSeconds":5},"DestinationType":"Adls","WriteDeleteLog":true,"IsOdiEnabled":false,"SchedulerIntervalInMinutes":60}
      0
      1
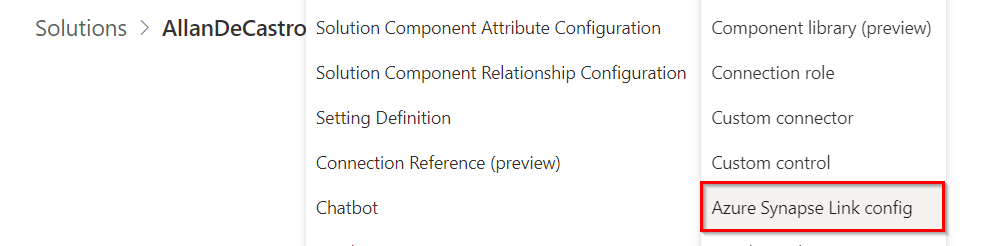
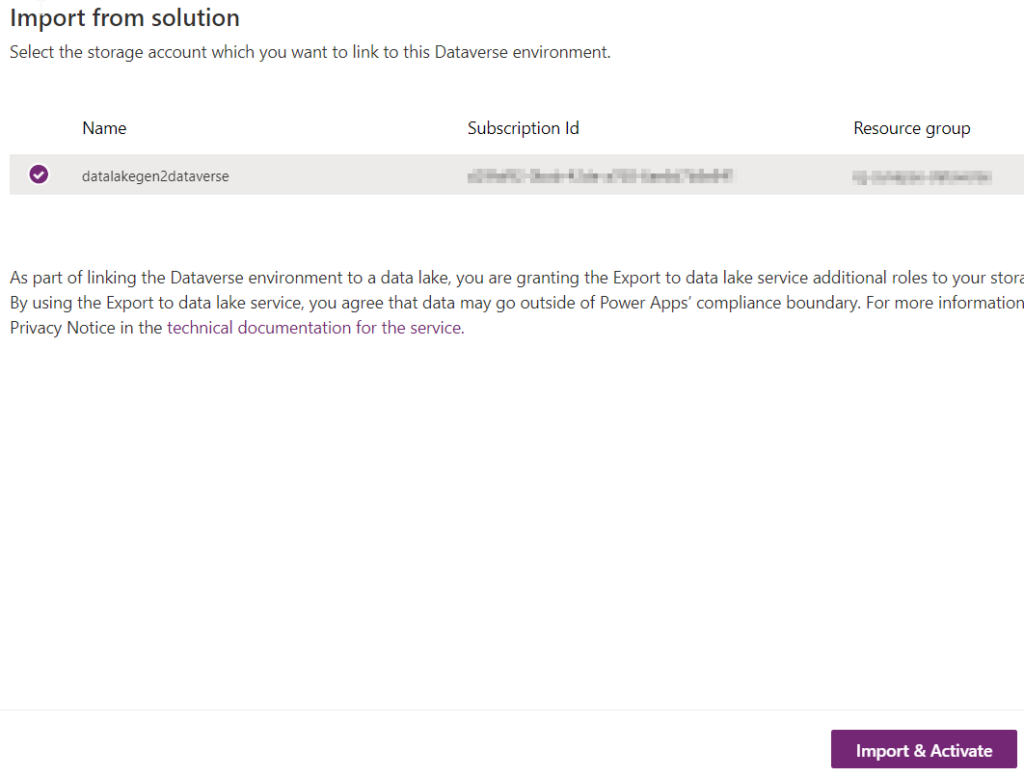
We can now import the solution like any other basic Dataverse solution, then go back to the Azure Synapse Link for Dataverse configuration screen to click on Import from Solution:
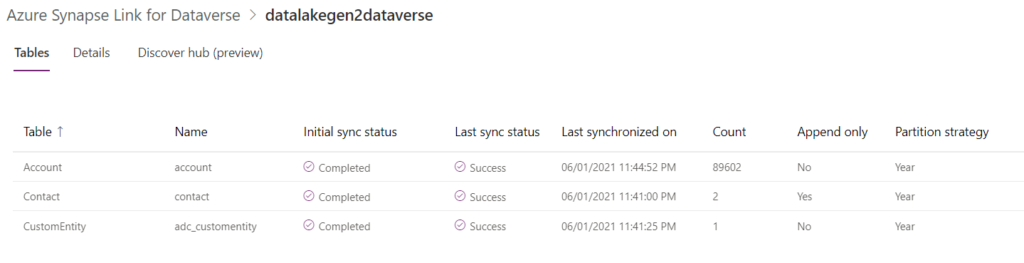
If we wait a little bit, we can see that the link has been established and the synchronisation is successful!
I hope you enjoyed this blog post and that either showed you the usefulness of this feature or saved you some time 🙂

Comments (12)
Raghusays:
August 4, 2022 at 7:25 PMHi,
Great article.
I’m currently trying the Open app source option and searching for my unmanaged solution and unable to find. This is to establish “Export to data lake” feature so i can see my unmanaged tables in data lake. Can you pls help me here? Pls note i’m a newbie with PowerApps
Regards
Raghu
Allan De Castrosays:
September 20, 2022 at 9:48 PMHello Raghu,
I’m not sur to fully understand what you want to achieve but you can get install the solution from App Source (https://appsource.microsoft.com/fr-fr/product/dynamics-365/mscrm.msft-d365-export-to-data-lake), create the synapse link and then add the table into your solution.
Regards,
Wajihsays:
October 5, 2022 at 11:50 AMHi Allan,
Is there a way to take that data to Azure SQL without any transformation. is there any options for that
Allan De Castrosays:
October 14, 2022 at 8:53 PMHey,
For sure, you can! There is a good documentation demonstrating how to do it : https://learn.microsoft.com/en-us/power-apps/maker/data-platform/azure-synapse-link-pipelines?WT.mc_id=5004279 🙂
Mr Umang Anandsays:
October 11, 2022 at 5:26 PMGreate article.
I wish I had found this a few months back. Life would have been so much easier.
How have you found the cost of this?
We seem to be getting charged a lot for the Serverless SQL version
Allan De Castrosays:
October 14, 2022 at 9:07 PMHey,
The price is not so high honestly, for the Synapse SQL Serverless endpoint it’s about 5$ per terabyte so after that there’s still the DataLake storage which is not huge either because it’s still a csv file!
Amithsays:
October 12, 2022 at 4:05 PMHi, please let me know if any one deletes the records in the dynamics where will those deleted records will be stored . As we need to identify the deleted records for any of the entity.
Allan De Castrosays:
October 14, 2022 at 9:08 PMHey Amith,
Thanks for you comment!
You can identify the records that have been deleted if you use an “Append Only” strategy and then the record will have a true on the IsDeleted column!
Simonsays:
April 11, 2023 at 7:46 PMHi Allan,
Thanks for the post. This greatly helped me get data from a dataverse instance into Azure Synapse. The goal is to use that data in Azure ML to run some experiments. So far I’ve managed to get a datastore and data asset set up thanks to this Blog – https://medium.com/geekculture/how-to-connect-azure-data-lake-gen-2-to-azure-machine-learning-510c00115add, however I can’t for the life of me work out why the column names are empty. I know I somehow need to link to the model.json but have hit a wall. Don’t suppose you’ve tried this already and have any bright ideas?
Thanks,
Simon
Allan De Castrosays:
April 12, 2023 at 10:38 PMHello Simon,
Thanks for your comment!
I’m not really experienced using Azure ML, I use it for business intelligence purposes with “basic” reporting :p.
Normally, just using the SQL Serverless endpoint, it should work, I suppose.
Samsays:
July 25, 2023 at 10:36 PMHi Allan,
Did you face issues while upgrading the synapse config solution. When I add new tables in dev and move them via solution, they are added to msdyn_exporttodatalakeconfigs and I can see them in QA, however, it doesn’t update the data lake configuration. I tried using Import from solution again but there it says “The source and destination configuration is same” which is not the case.
Allan De Castrosays:
September 10, 2023 at 2:32 PMHello Sam,
Yes your correct, the msdyn_exporttodatalakeconfigs file is only use to store the configuration but do not apply the changes so you must do it manually in target environment :/ I still use it to ensure that it’s versioned somewhere and in case I want to set up a new environment.
Regards,